Table of Content
So in that sense, having another drink is like taking hair from the dog that bit you. Hippie braids are one more name for bohemian box braids, which are simply box braids with undone ends. It is possible to do a perm at home by yourself if you have the right supplies and instructions. Thanks to all authors for creating a page that has been read 155,699 times.

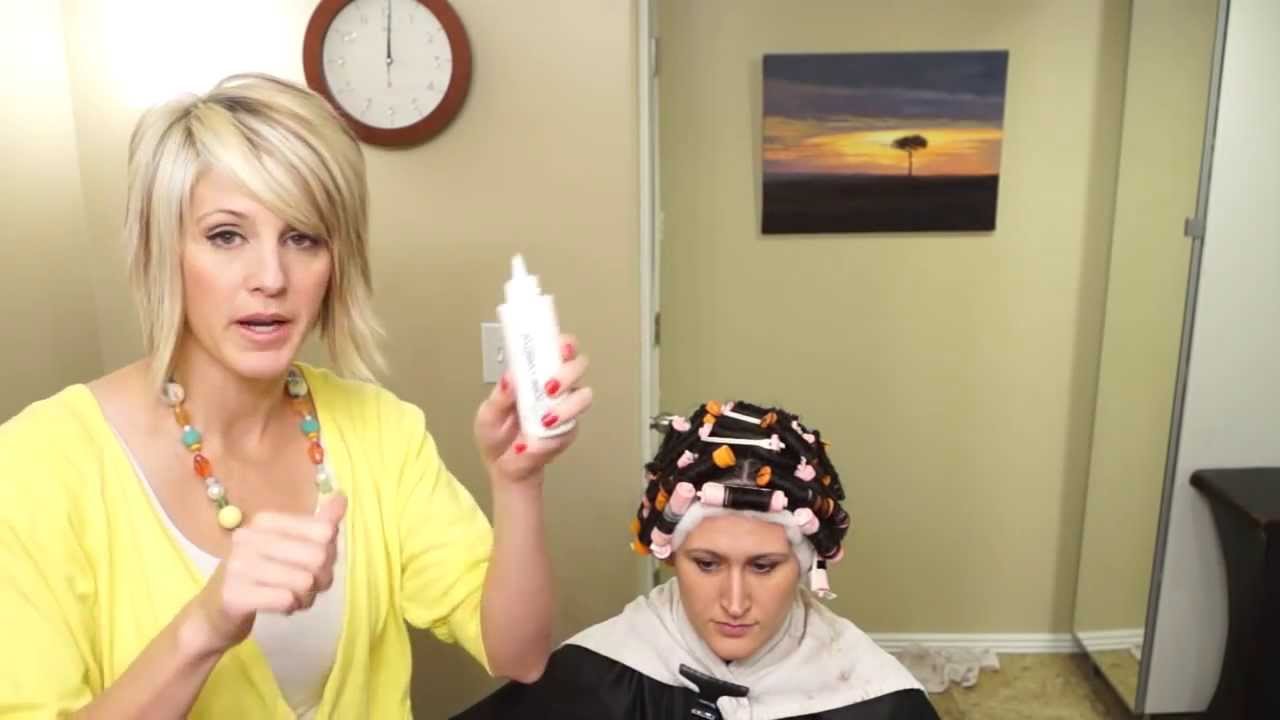
If only you could create those loose waves that add volume. You CAN wear your hair straight after perming if you'd like. Although letting your hair dry naturally is best, it won't hurt your perm to blow your hair out straight and/or using a straightening iron. Just make sure and use styling products for dry hair that will protect it from the heat of styling aids. Apply the neutralizer thoroughly to each wrapped rod. Prepare the neutralizer solution if it is not already pre-mixed, and put it into a squeeze bottle with a pointed nozzle.
How long should a newborn grow their hair?
Take a thin strand of hair from the middle section. Use the handle of a rat-tail comb to separate a thin strand of hair from the middle section. Pull it taut so that it is perpendicular to your head. If you did the latter, you’ll have to go back and do the front once you reach your nape. Pre-Perm Conditioner gently prepares your hair for a natural-looking perm.
You can buy perm paper wrappers at any beauty supply store. They basically look like small squares of white tissue paper. Use a comb to make a vertical part that's ½ inch (1.25 cm) wide.
Perm & Dye – 10 Things You Need To Know (Answered)
The remaining sections from the back portion of hair will be roughly the same size as this first one. The spray is water-based and is easy to apply. Make sure you use an atomizer, so the mist is not too strong. There are two types of neutralizers available- gel-based and spray-based. Apply enough heat from the blow dryers thermal setting to safely frizz each section slightly and prevent tangles . Wet each section thoroughly with water or conditioner and place it onto a heat-resistant flat surface, such as a padlock ring or clamshell clip.
You do not want to get the perm solution on your skin, so you’ll have to take extra precautions. Wrap a towel around your neck first, then put on a plastic cape, like what you'd use for dyeing hair. Finally, pull on a pair of plastic or vinyl gloves.
How To Perm Hair Step By Step
Twist the hair up and clip it in place at the back of your head. This leaves you with the hair on the top and sides of your head. Divide that hair into 2 sections, making the division where you usually part your hair. Twist and clip those 2 sections up individually.

So there is no harm in waiting until you have more money to spend on your hair. It’s all about committing and keeping your “perm” for as long as you want. Once you have all of your locks rolled into a nice package, it’s time to put them on a rotary cutter. To make this easier, roll the locks in perm paper first. This will prevent the paper from sticking to the locks and creating a mess in the process.
You can gently comb your hair with your fingers or a wide-toothed comb, but you’ll have to wait 1 week before you brush it. More importantly, leave your hair as-is for the duration of the week. This means no curling, straightening, ponytails, braids, etc. Split your hair into 3 sections, with a middle and 2 sides. Use the handle of a rat-tail comb to create 2 side parts, 1 on each side of your forehead. Make the middle section start at your forehead and end at your nape.

Hair damage is caused by many things, but one of the most common causes is using a perm at home. A perm is a treatment that uses chemicals to change the structure of your hair. This can cause your hair to become weak and brittle, and it can also cause your hair to fall out.
You can buy the cape and gloves at a salon or beauty supply store. The Curl it extra conditioner from the Permanent Styling range by Wella offers special protection thanks to active nourishing ingredients. Your curls will become bouncier, more flexible and shinier. I got this kit because it’s summer and I like to wear less makeup in the summer. I thought with nice curled eyelashes I wouldn’t need/want to wear mascara much.
However, and this is more on me than the kit, my eyelashes look nice and curled, but I’d still rather wear mascara. “I have never used anything like this before, and I was pleasantly surprised with how easy it was to complete. My eyes did get a bit irritated and it wasn’t the most comfortable process, but the instructions in the box were all I needed and it worked well the first go. This is why my first attempt did not work as well, I had lightly spread it on my lashes which was not enough.


No comments:
Post a Comment